How to Take Better Food Photos for Plate Sales
Take clear, truthful food photos with your phone using a repeatable lighting, framing, styling, editing, and export workflow for plate sales.
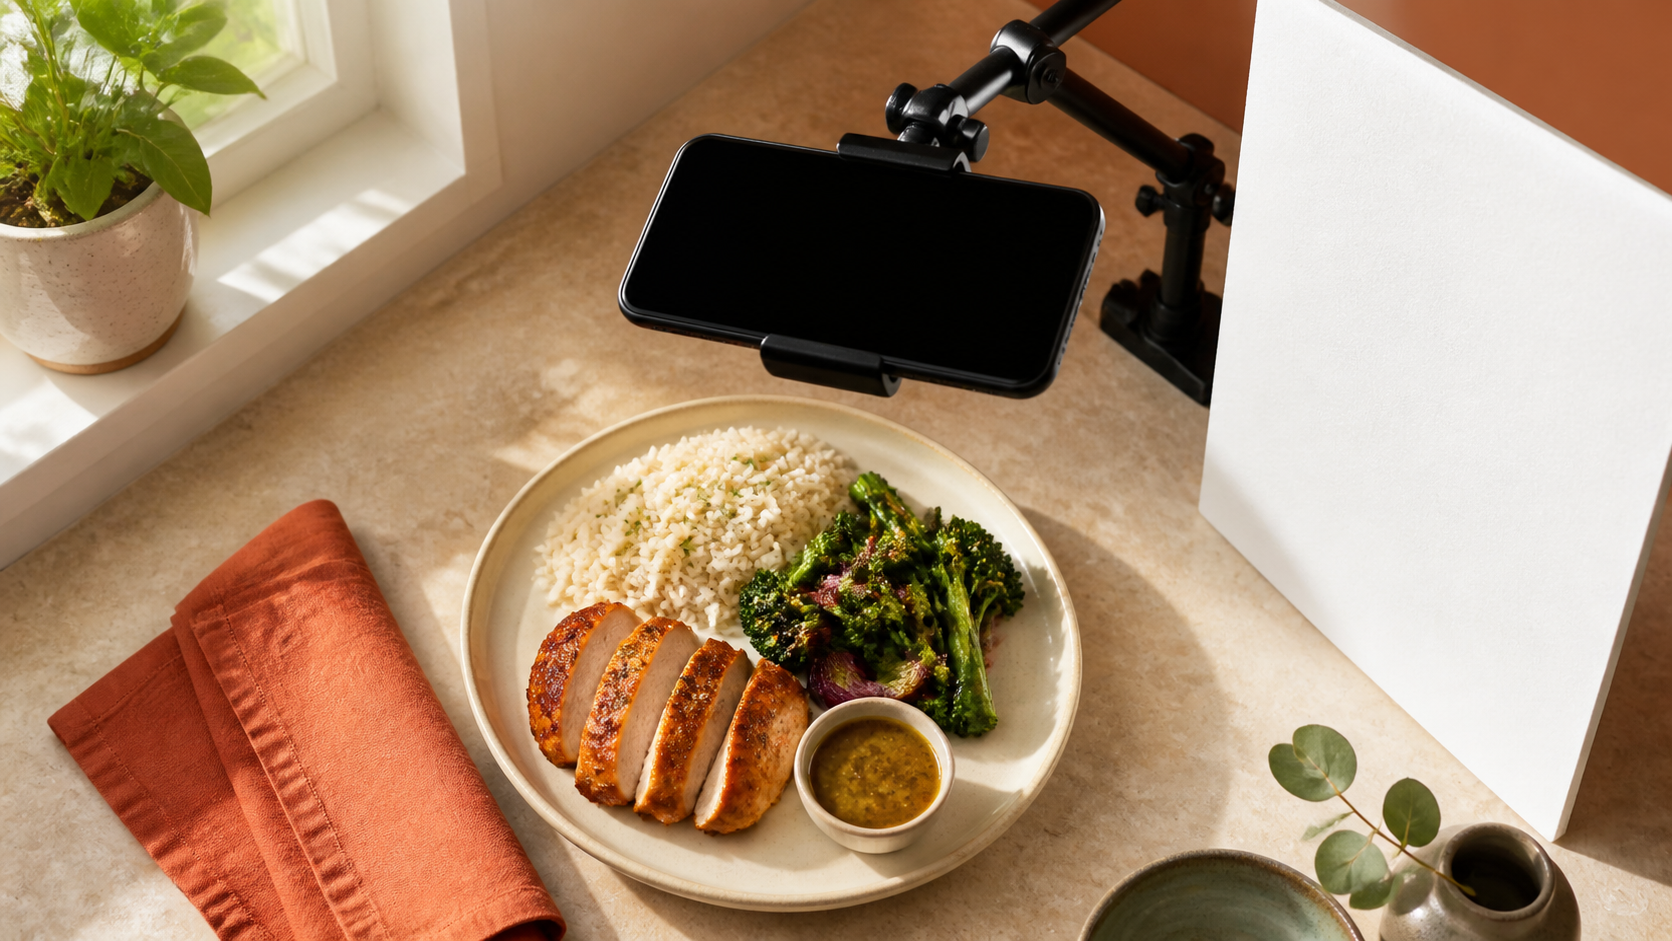
A good plate photo should help a customer understand the meal before they read the caption. They should be able to see the portion, main dish, sides, texture, and packaging without guessing whether the image represents what they will actually receive. That does not require a studio camera. It requires a small setup you can repeat.
This guide will help you create that setup with a phone, one dependable light source, a stable angle, and a short shot list. You will also build a file and editing routine that makes the food look clear without turning the advertised meal into a different product.
Start with the real sale portion
Photograph the recipe and portion you intend to sell. Use the same protein size, side quantities, sauce cup, garnish, and container that belong to the offer. If the customer receives food in a takeout tray, capture at least one useful image in that tray even if you also make a plated hero image.
The FTC’s advertising guide for small businesses says advertising must be truthful and non-deceptive, and that a material statement or omission can mislead a reasonable customer. Applied to a menu photo, the practical rule is simple: do not add food that is not included, hide a smaller side behind perspective, or fill a photography plate more generously than the paid order.
Build the photo portion from your standardized recipe and verified yield. That makes the image repeatable when the menu returns and gives your packing team a real visual reference instead of an aspirational one.
Keep styling functional. Wipe sauce from the outside of the cup, turn the best cooked surface toward the camera, separate foods enough to show their edges, and remove packaging smears. Those actions clarify the actual meal. Fake grill marks, an unlisted garnish, or a second layer of protein changes the promise.
Build one small lighting station
Pick a counter or table near a window where you can return at roughly the same time of day. Turn off overhead lights for the first test. Mixed window light and warm kitchen bulbs can pull neutral food toward orange, green, or blue.
University of California Agriculture and Natural Resources explains that a single similar light source helps a smartphone handle white balance, while mixed natural and artificial light can create color problems. Its guidance also shows how a white reflector can lift shadows and how bright, soft, even light is easier for a small phone sensor than low light.
Use this starting layout:
- Place the food beside the window rather than deep in the room.
- Turn the plate until light travels across the food from the side or slightly behind it.
- Put white foam board or plain white card opposite the window to soften the darkest shadow.
- Move the reflector closer for more fill or farther away for deeper shadows.
- If direct sun creates hard bright patches, move out of the beam or soften it with a safe, stable diffuser that cannot touch food or heat.
Take one test image before adding props. If the food is already clear, stop. A folded napkin or neutral board can support the palette, but five bowls, loose herbs, and scattered utensils turn a menu photo into a puzzle.
Set the phone before changing the food
Clean the camera lens with an appropriate lens cloth, mount or brace the phone, and use the main rear camera as a dependable starting point. Avoid pinching far into digital zoom. Move the phone or plate when you can do so without distorting the setup.
On an iPhone, Apple documents how to tap the subject, adjust exposure, lock focus and exposure, and turn on the grid and level. Google provides similar focus, exposure-lock, and framing tools for Pixel cameras. Your phone may name the controls differently, but the operating sequence is the same:
- Turn on the grid or leveling aid.
- Tap the main food, not the table, to set focus.
- Lower or raise exposure until pale rice and glossy sauce keep visible detail.
- Lock focus and exposure when the phone supports it so a series stays consistent.
- Use a short timer or remote shutter if touching the screen moves the frame.
Do not judge sharpness only from the full-screen preview. Zoom into the captured image and check the focal area, highlights, and corners. One technically clean photograph is more useful than twenty slightly blurred versions of the same angle.
Capture three jobs, not thirty random angles
A compact shot list keeps the food from sitting while you improvise. Make three photographs that answer different customer questions.
The complete meal
Use an overhead or slightly angled view that shows every included component and the real portion relationship. Leave some open background around the container so you can crop for different placements without cutting off the food.
The texture detail
Move closer for the feature that sells the dish: the cut face of roasted chicken, the surface of baked macaroni, the crumb of cornbread, or the consistency of a sauce. Keep enough context that the viewer still recognizes the dish. A detail photo should support the complete-meal image, not replace it.
The packed order
Show the closed or ready-to-close package, any included sauce, and the arrangement the customer will carry away. This image is especially useful when you have already followed a tested takeout-container workflow. Do not photograph a lid balanced loosely on a full tray if customers receive a properly sealed package.
For each job, take a level version and one carefully adjusted alternative. Then stop and compare them. A repeatable six-frame set is easier to review than a camera roll with dozens of tiny variations.
Edit for consistency without changing the promise
Choose the image that best explains the offer before opening the editing controls. Straighten it, make a modest crop, and correct brightness or color so the file resembles the food you saw in the same light. Compare the edit with the actual plate while it is still available.
Avoid edits that change a buying fact. Do not enlarge a protein portion, clone extra pieces, remove a side that is included, replace a background in a way that changes the setting claim, or push saturation until the sauce and vegetables become colors the customer will not receive. Be especially cautious with automatic or generative tools that may alter edges, ingredients, packaging, or quantity without making the change obvious.
Save a clean master before adding any promotional text in a design app. That master can serve a menu page, blog post, social post, order form, and future crop. Name it by date and menu item—for example, 2026-08-17-chicken-plate-overhead—instead of leaving it as an anonymous camera number.
Export for the destination, then inspect the crop
Keep the original large enough to make more than one version. Export a copy for the destination rather than repeatedly saving over the master.
Instagram currently says it handles photos at up to 1080 pixels wide and supports aspect ratios from 1.91:1 through 3:4; an unsupported ratio may be cropped. Platform specifications can change, so check the current help page when you build or refresh your template.
Open the exported image on a phone before posting. Confirm that the food is not cut off, the brightest areas still have detail, and the important component remains obvious at feed size. If the photo will be the first slide in a carousel, check every later image in the same chosen orientation because Instagram applies one orientation across the set.
Pair the finished image with the offer details rather than forcing the photo to do every job. Your caption or menu should still state the dish, included sides, price, ordering method, cutoff, and fulfillment details. The broader Instagram and Facebook marketing rhythm can show you where this photo fits between the menu announcement, reminder, prep update, and customer proof.
Run a repeatable photo-session check
Before the next menu drop, use this order:
- Portion: Build the real sale quantity with the real included components.
- Light: Use one consistent source and a simple reflector before adding equipment.
- Phone: Clean the lens, level the frame, focus on the food, and check exposure.
- Shots: Capture the complete meal, one texture detail, and the packed order.
- Truth: Remove distractions, not ingredients or limitations the customer should see.
- Files: Save a named master, then make destination-specific copies.
- Review: Inspect the final crop on a phone beside the written offer.
Start with one menu item and mark the counter position, phone height, angle, reflector placement, and time of day that worked. Recreate that setup when the dish returns. Consistency will make a modest phone setup more valuable than a complicated photo day you cannot repeat.
Once the image is honest and clear, connect it to a focused menu, profitable price, order process, and manageable sale day. The Selling Plates guide brings those pieces into one plan so the photograph supports a business system instead of becoming a separate project.
Ready to move?
Turn the research phase into your first sale.
The guide brings pricing, menu planning, marketing, and setup into one clear playbook.
Get the guide on Gumroad